
Java 入門指南
單元 29 - 首頁
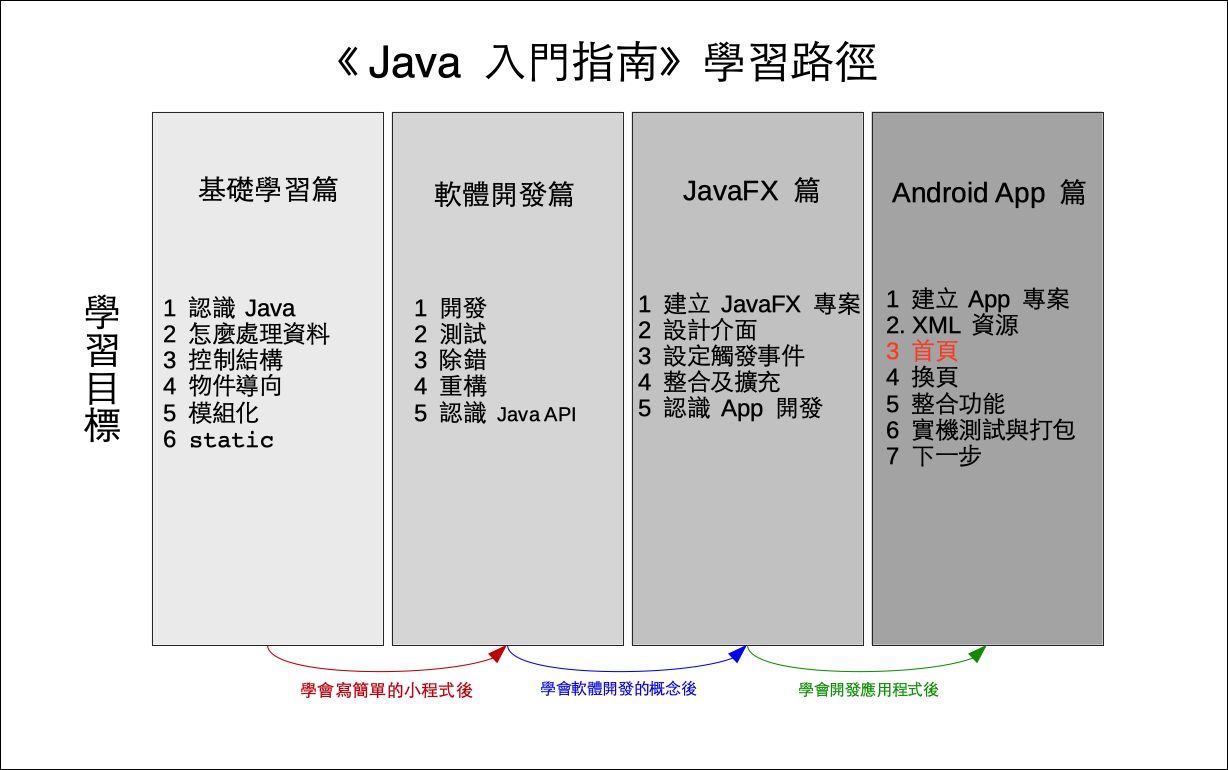
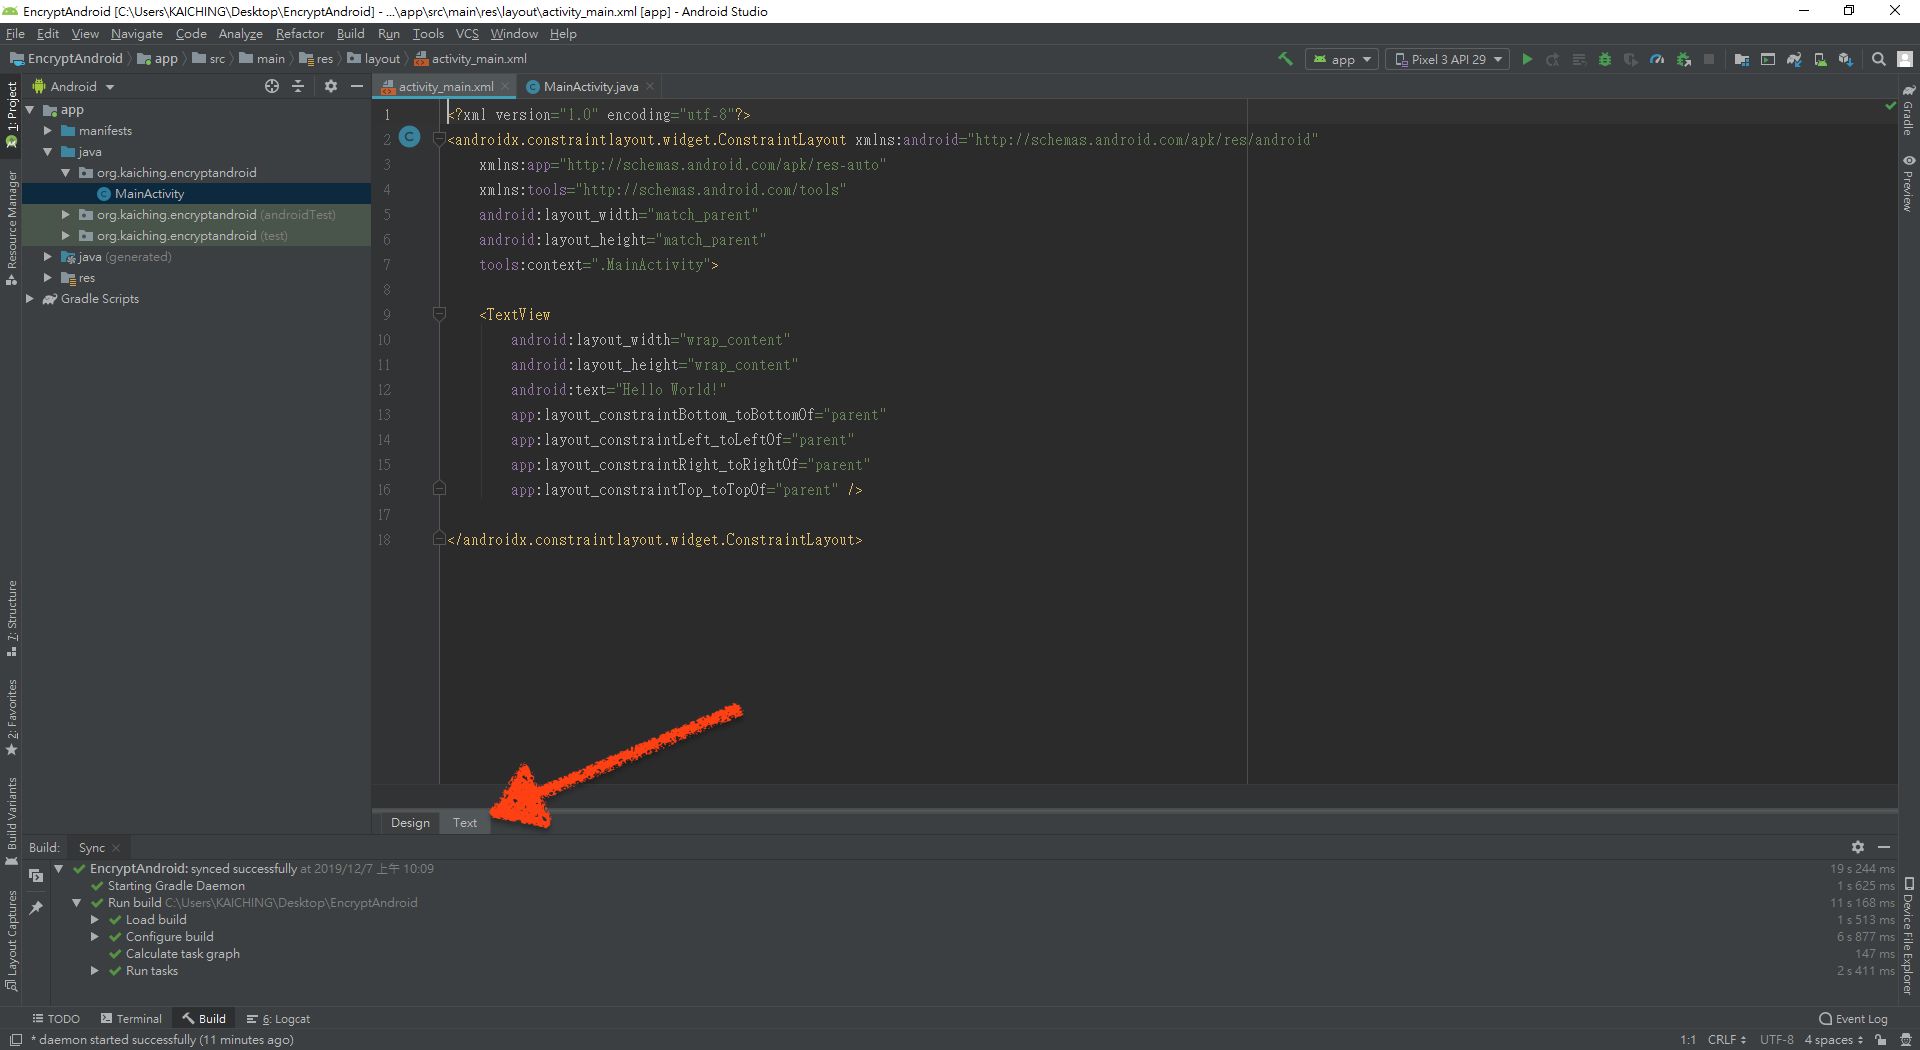
開啟 activity_main.xml ,預設開啟的是設計工具,底下紅色框框圍起來的部份是 App 頁面的即時預覽區

左側上方是 App 元件區,可以拖放到中間的 App 頁面
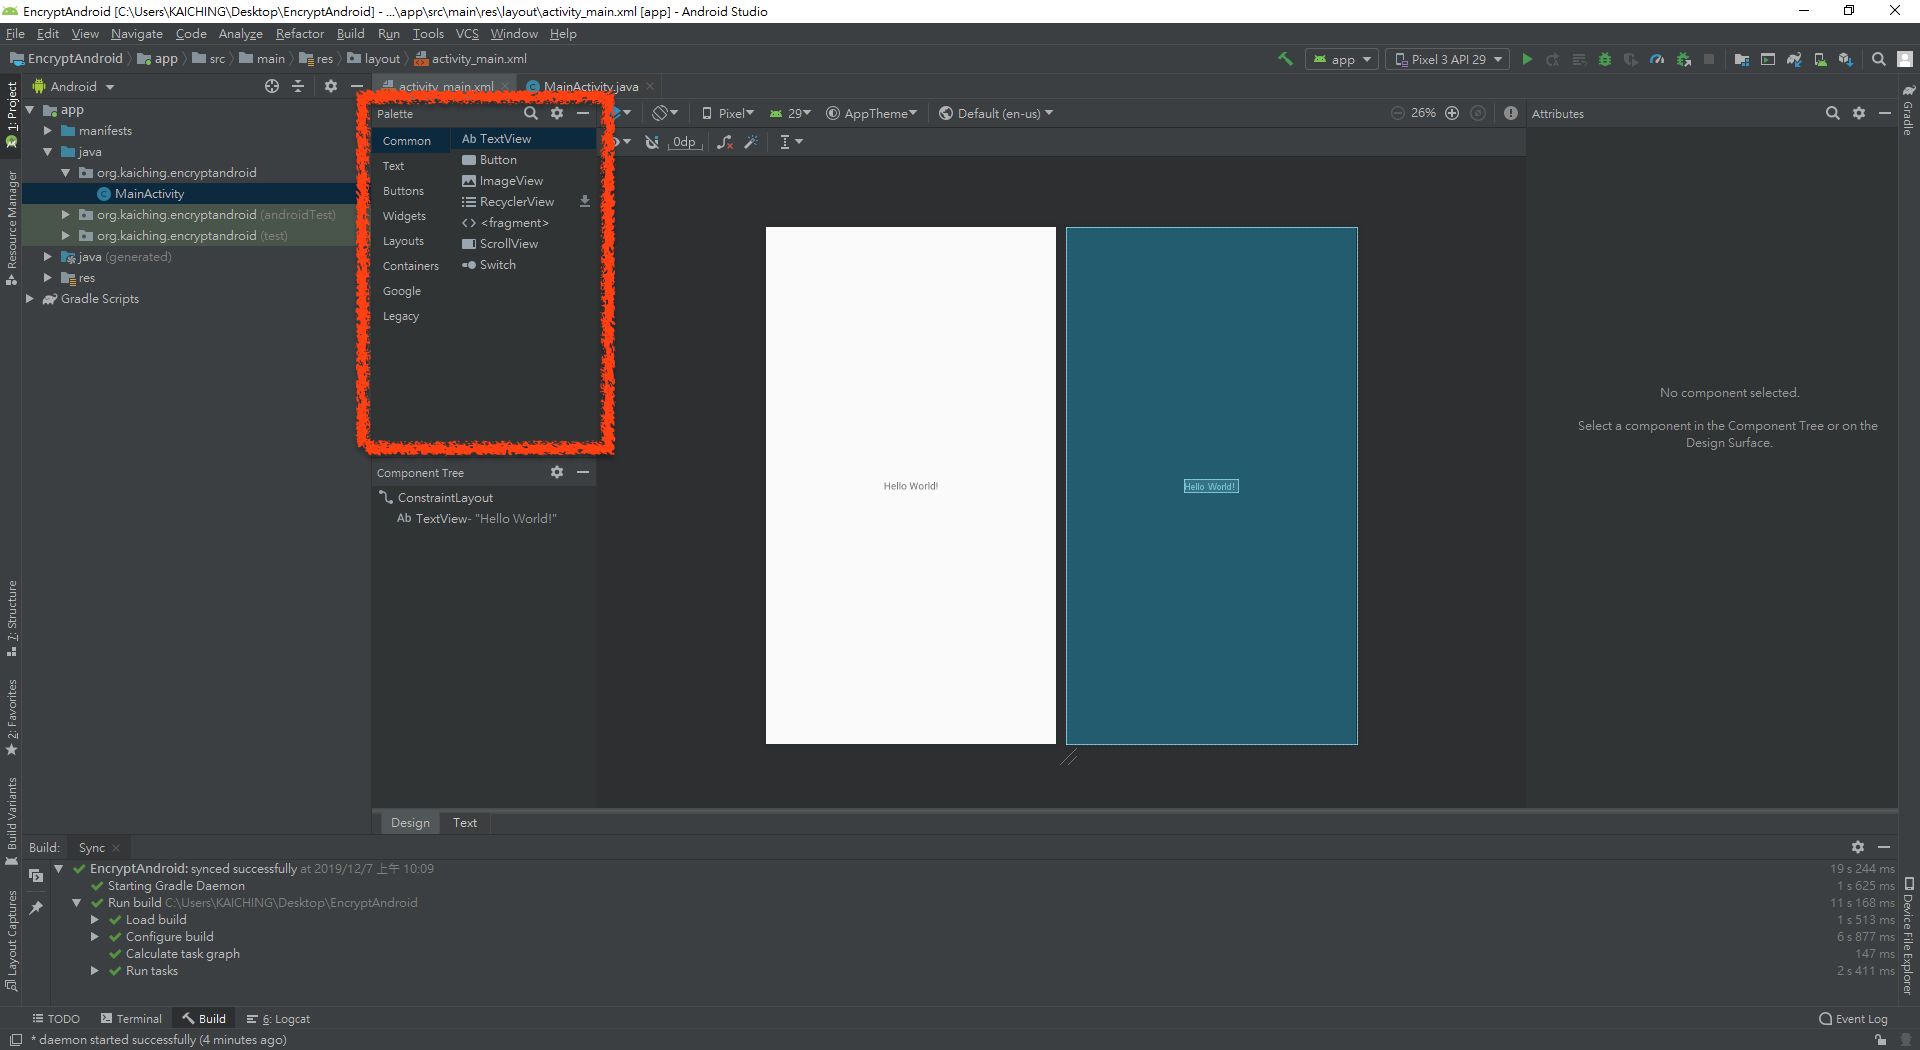
左側下方是 App 元件的樹狀圖
App 頁面的最外層預設是用 ConstraintLayout ,這可以讓 App 元件自動依手機螢幕尺寸縮放。
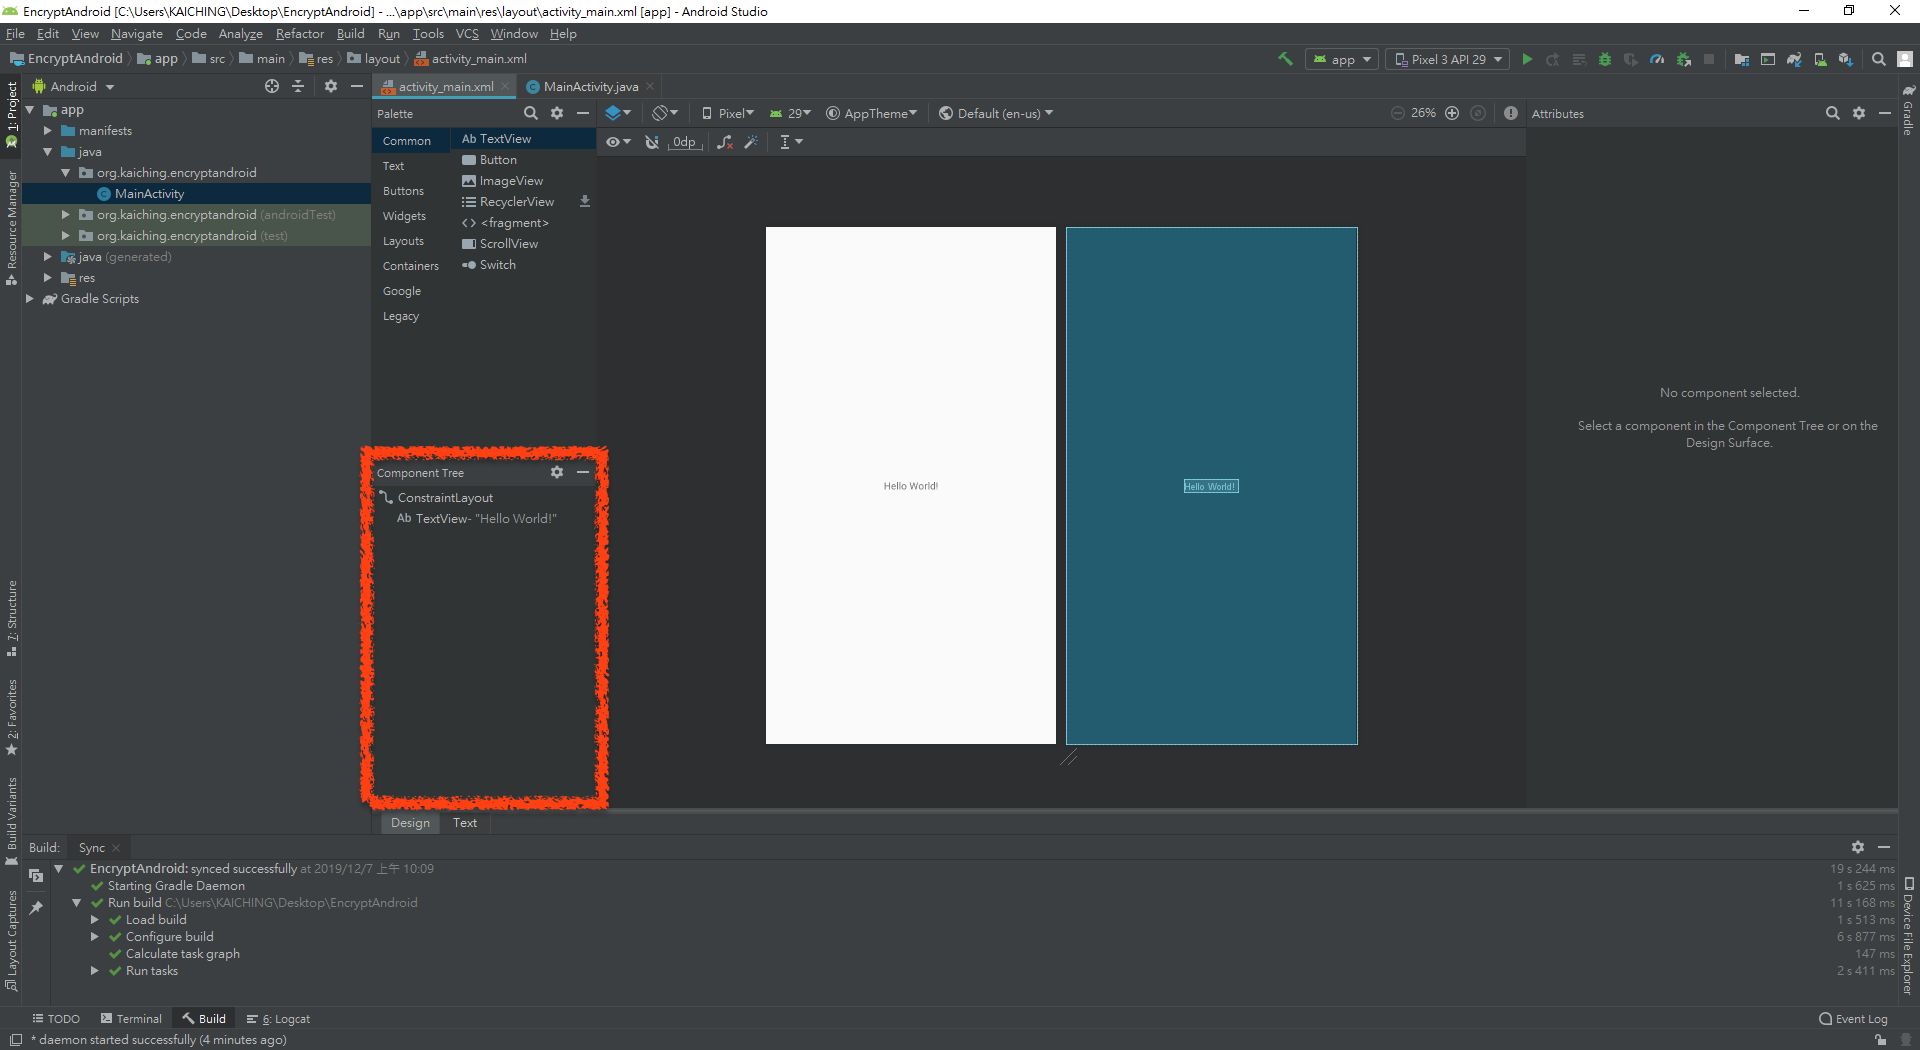
如果點選中間的 Hello World! ,這是一個 TextView ,右側的屬性區就會出現所有相關的屬性設定
我們打算採取直接修改 XML 的方式設計頁面,底下切換到 Text 頁籤
如果有設計工具新增 App 元件到頁面上,或是調整 App 元件的屬性值, XML 檔案都會隨之自動調整修改,如果還不熟悉 XML 的話,可以用設計工具設計頁面,然後參照 XML 內容。
然後換成以下內容
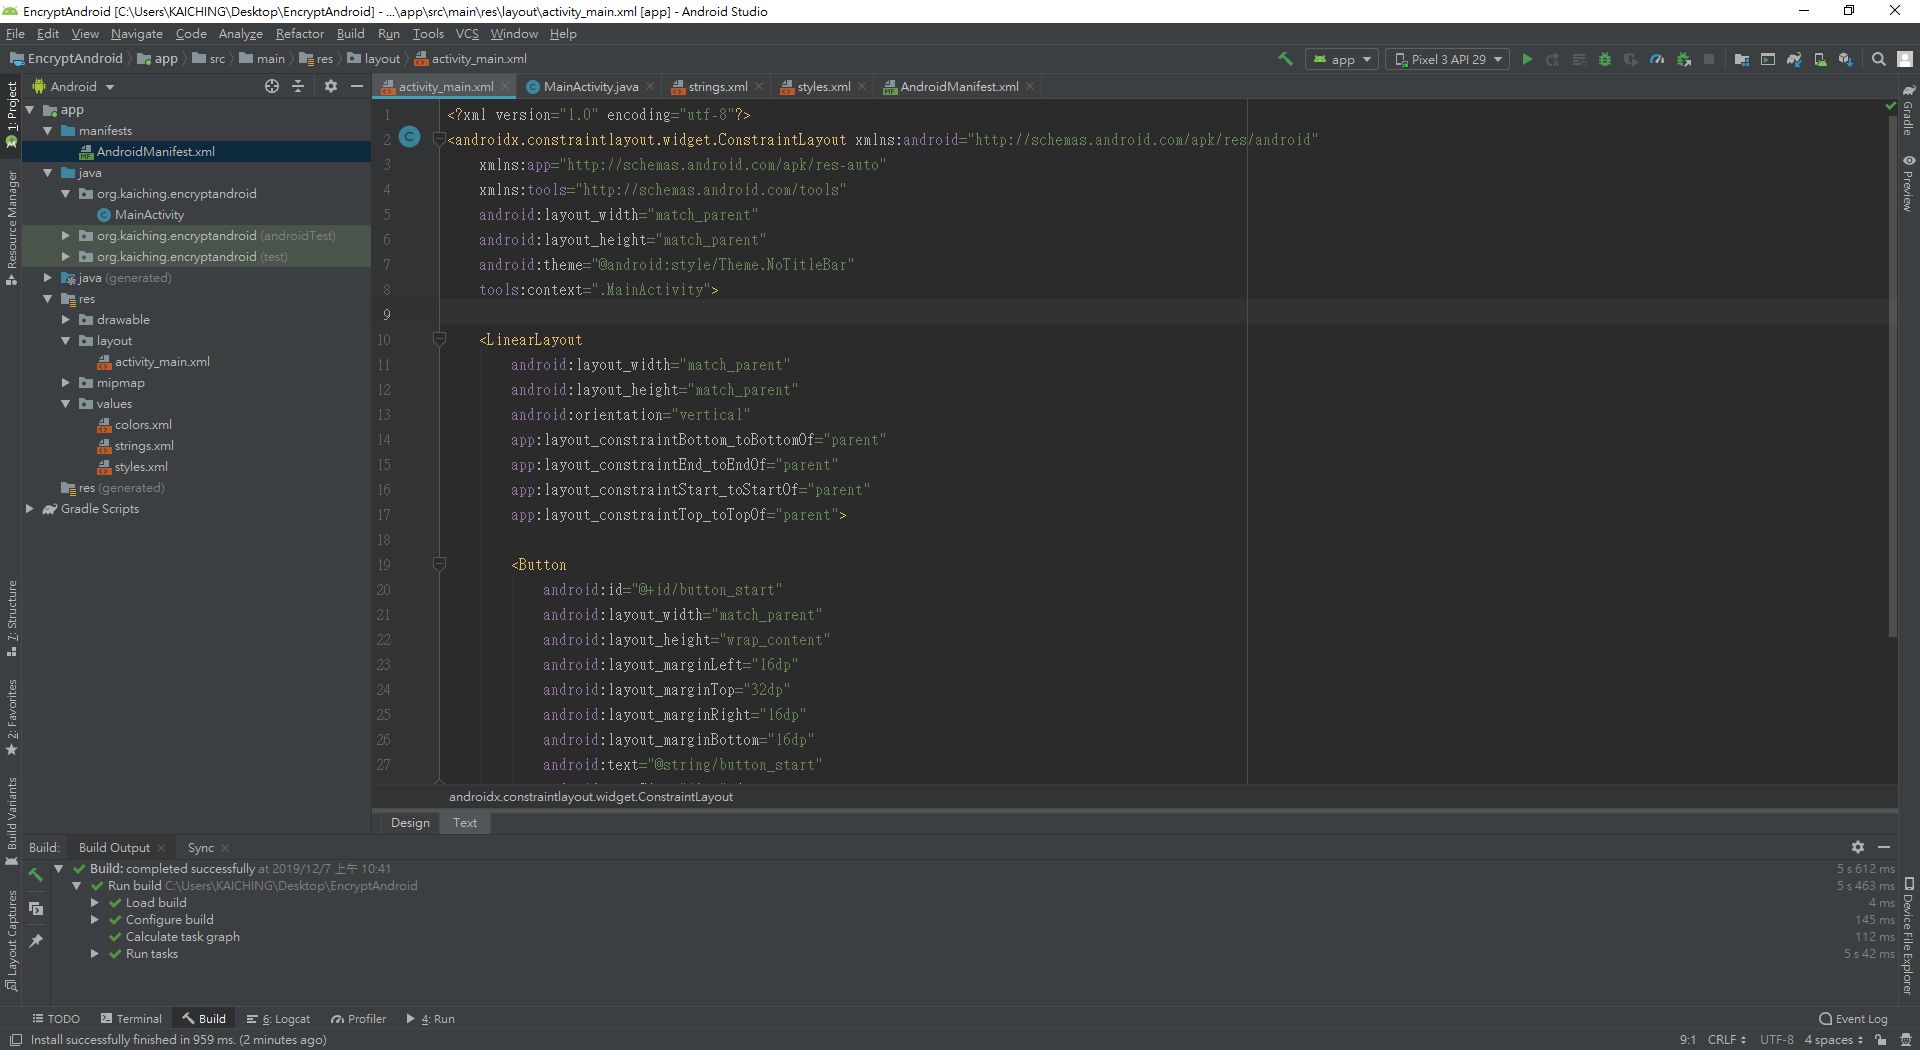
完整標記碼可以參考範例程式篇的 activity_main.xml 。
底下逐部分來看標記碼,首先 <androidx.constraintlayout.widget.ConstraintLayout>
<androidx.constraintlayout.widget.ConstraintLayout
    xmlns:android="http://schemas.android.com/apk/res/android"
    xmlns:app="http://schemas.android.com/apk/res-auto"
    xmlns:tools="http://schemas.android.com/tools"
    android:layout_width="match_parent"
    android:layout_height="match_parent"
    android:theme="@android:style/Theme.NoTitleBar"
    tools:context=".MainActivity">
xmlns: 後面接網址有三行,這部分是專案 (project) 預設的樣式碼,基本上保留預設的設定,至於
android:layout_width="match_parent"
android:layout_height="match_parent"
layout_width 是頁面寬度, layout_height 則是頁面長度,這裡的 match_parent 表示配合手機的螢幕尺寸。然後底下這一行是新增的
android:theme="@android:style/Theme.NoTitleBar"這是把樣式設定為 Theme.NoTitleBar ,也就是上一單元做的全螢幕設定。
底下這一行是設定跟哪一個 Java 程式檔案連動
tools:context=".MainActivity">繼續看到把 <TextView> 換成 <LinearLayout> ,裡面有一個 <Button>
<LinearLayout
    android:layout_width="match_parent"
    android:layout_height="match_parent"
    android:orientation="vertical"
    app:layout_constraintBottom_toBottomOf="parent"
    app:layout_constraintEnd_toEndOf="parent"
    app:layout_constraintStart_toStartOf="parent"
    app:layout_constraintTop_toTopOf="parent">

    <Button
        android:id="@+id/button_start"
        android:layout_width="match_parent"
        android:layout_height="wrap_content"
        android:layout_marginLeft="16dp"
        android:layout_marginTop="32dp"
        android:layout_marginRight="16dp"
        android:layout_marginBottom="16dp"
        android:text="@string/button_start"
        android:textSize="18sp" />
 </LinearLayout>
<LinearLayout> 是垂直或水平依序排列 App 元件的版面設計,先看到設定 orientation 的這一行
android:orientation="vertical"<LinearLayout> 的 orientation 設定為 vertical ,表示這個 <LinearLayout> 是從上而下逐一排列 App 元件。
繼續看到 layout_width 與 layout_height 的設定
android:layout_width="match_parent"
android:layout_height="match_parent"
兩者都是 match_parent ,表示兩個設定都依照上層 ConstraintLayout 的設定。
在 <LinearLayout> 中還有關於上下左右的 layout_constraint 的設定
app:layout_constraintBottom_toBottomOf="parent"
app:layout_constraintEnd_toEndOf="parent"
app:layout_constraintStart_toStartOf="parent"
app:layout_constraintTop_toTopOf="parent"
這裡 parent 意思也是依照上層 ConstraintLayout 的設定。
底下 <Button> 的 id 設定為 button_start
android:id="@+id/button_start"layout_width 設定為 match_parent ,也就是符合手機螢幕的寬度,而 layout_height 設定為 wrap_content ,表示用的是 App 元件自己的尺寸
android:layout_width="match_parent"
android:layout_height="wrap_content"
下面四個 layout_margin 是指按鈕對四周的距離,也就是 layout_width 雖然佔滿整個手機螢幕寬度,透過 layout_margin 的左右出現指定的空白距離
android:layout_marginLeft="16dp"
android:layout_marginTop="32dp"
android:layout_marginRight="16dp"
android:layout_marginBottom="16dp"
按鈕的文字設定為 string.xml 中的 button_start ,至於字型大小設定為 18sp
android:text="@string/button_start"
android:textSize="18sp"
螢幕尺寸的通用單位為 dp ,字型通常會用 sp 設定。
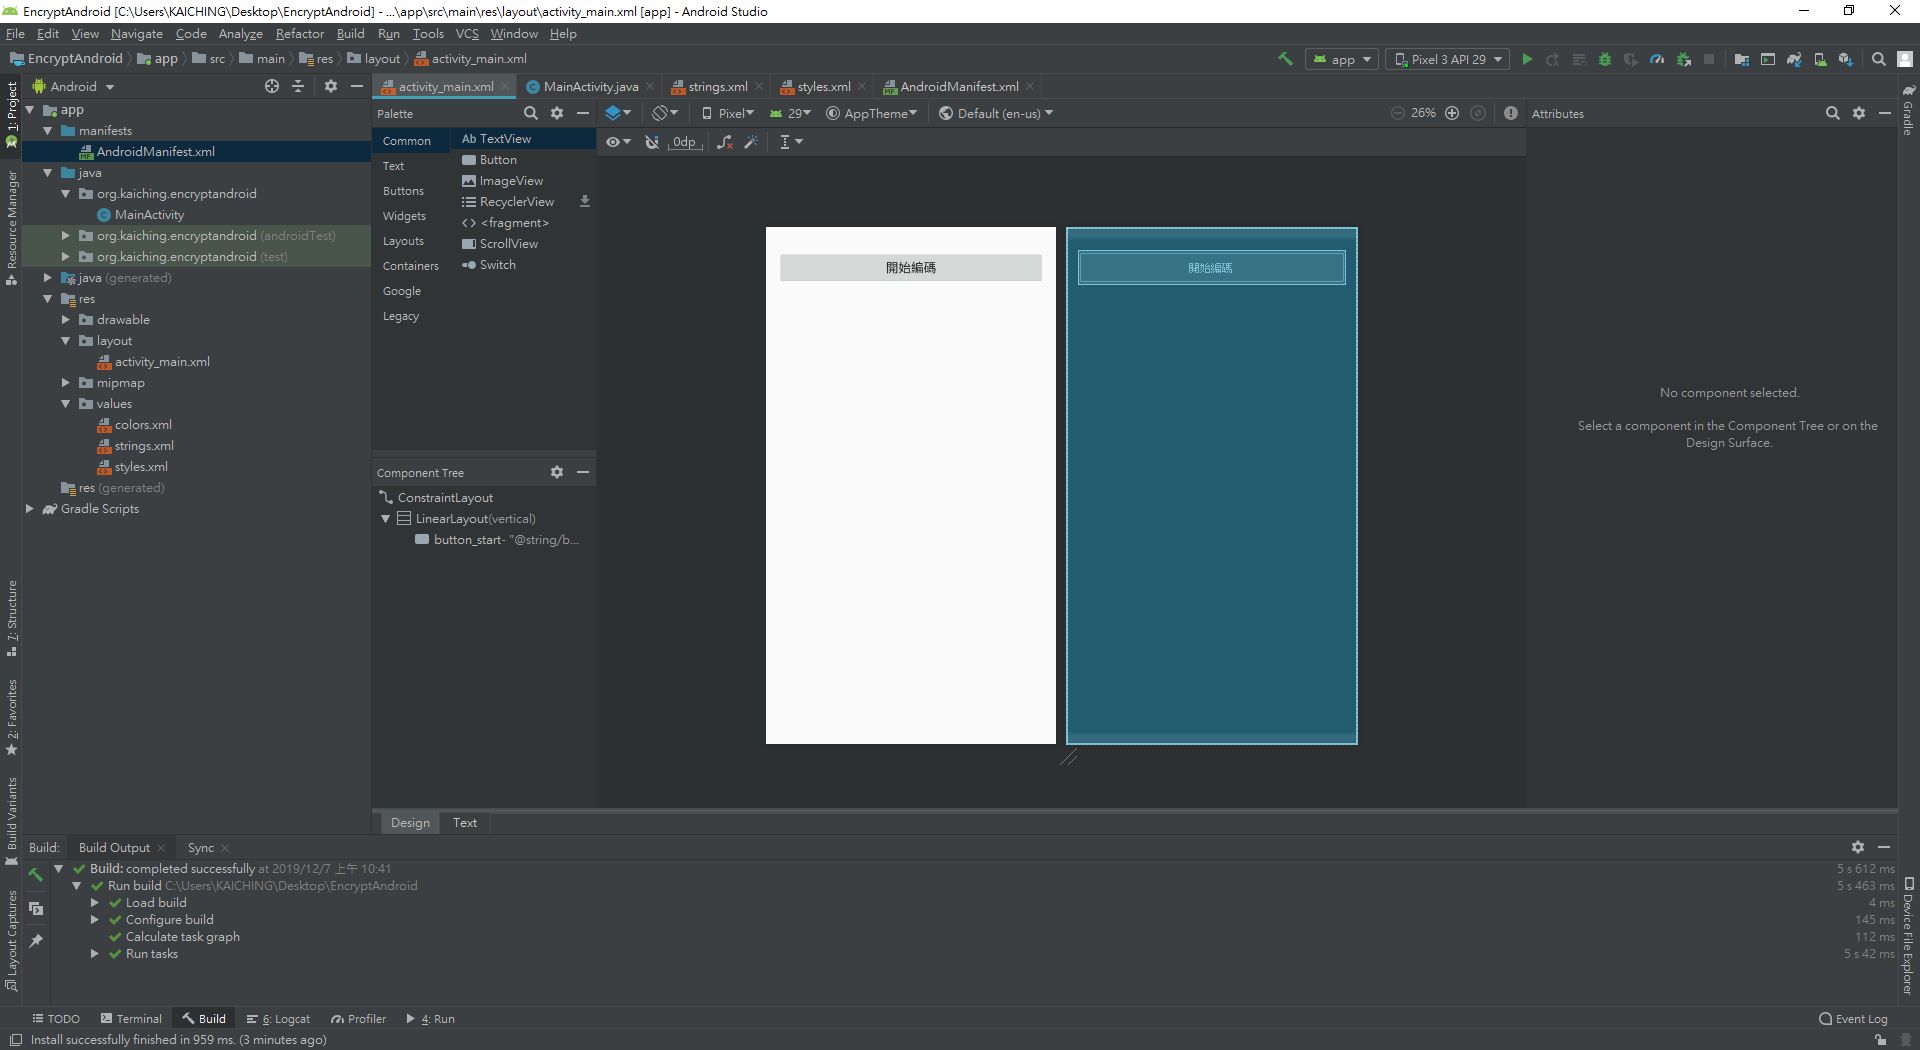
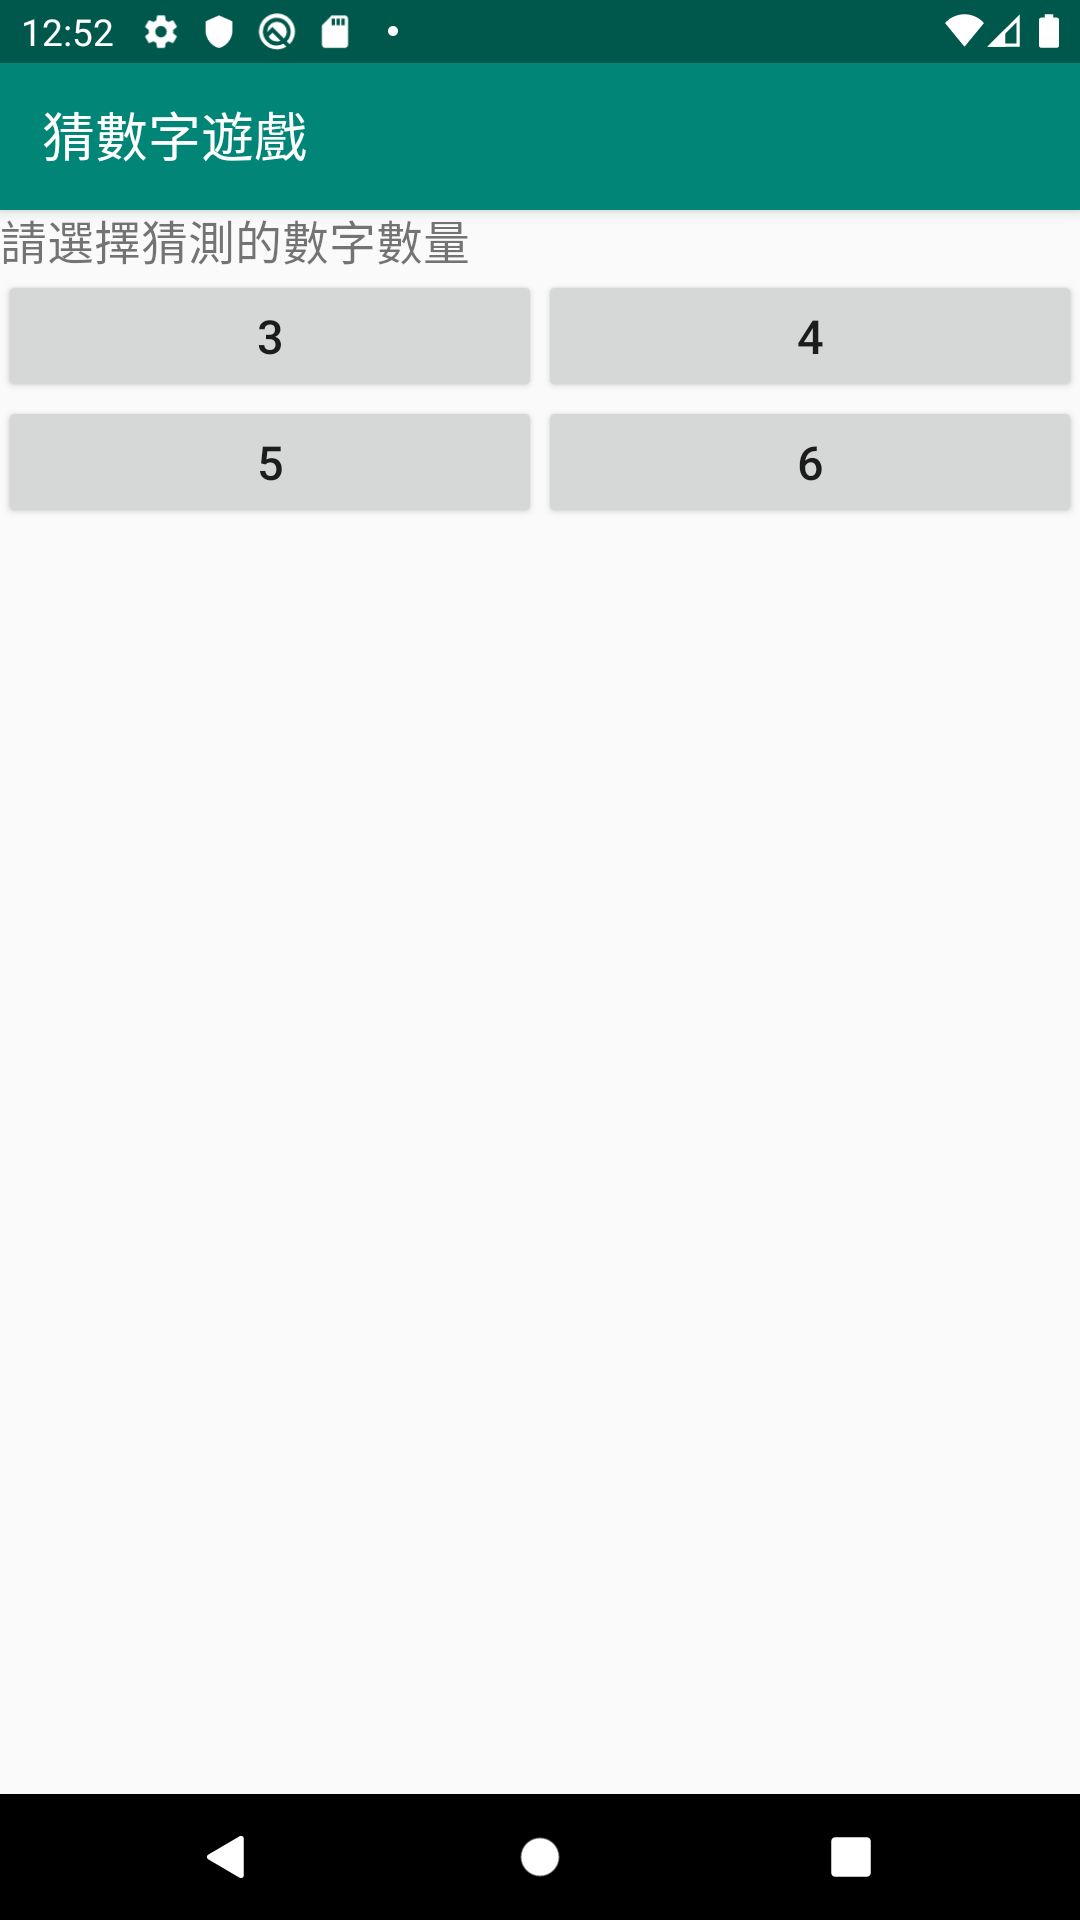
切換到 Design 頁籤,可以看到就是一個開始編碼的按鈕在 App 頁面上
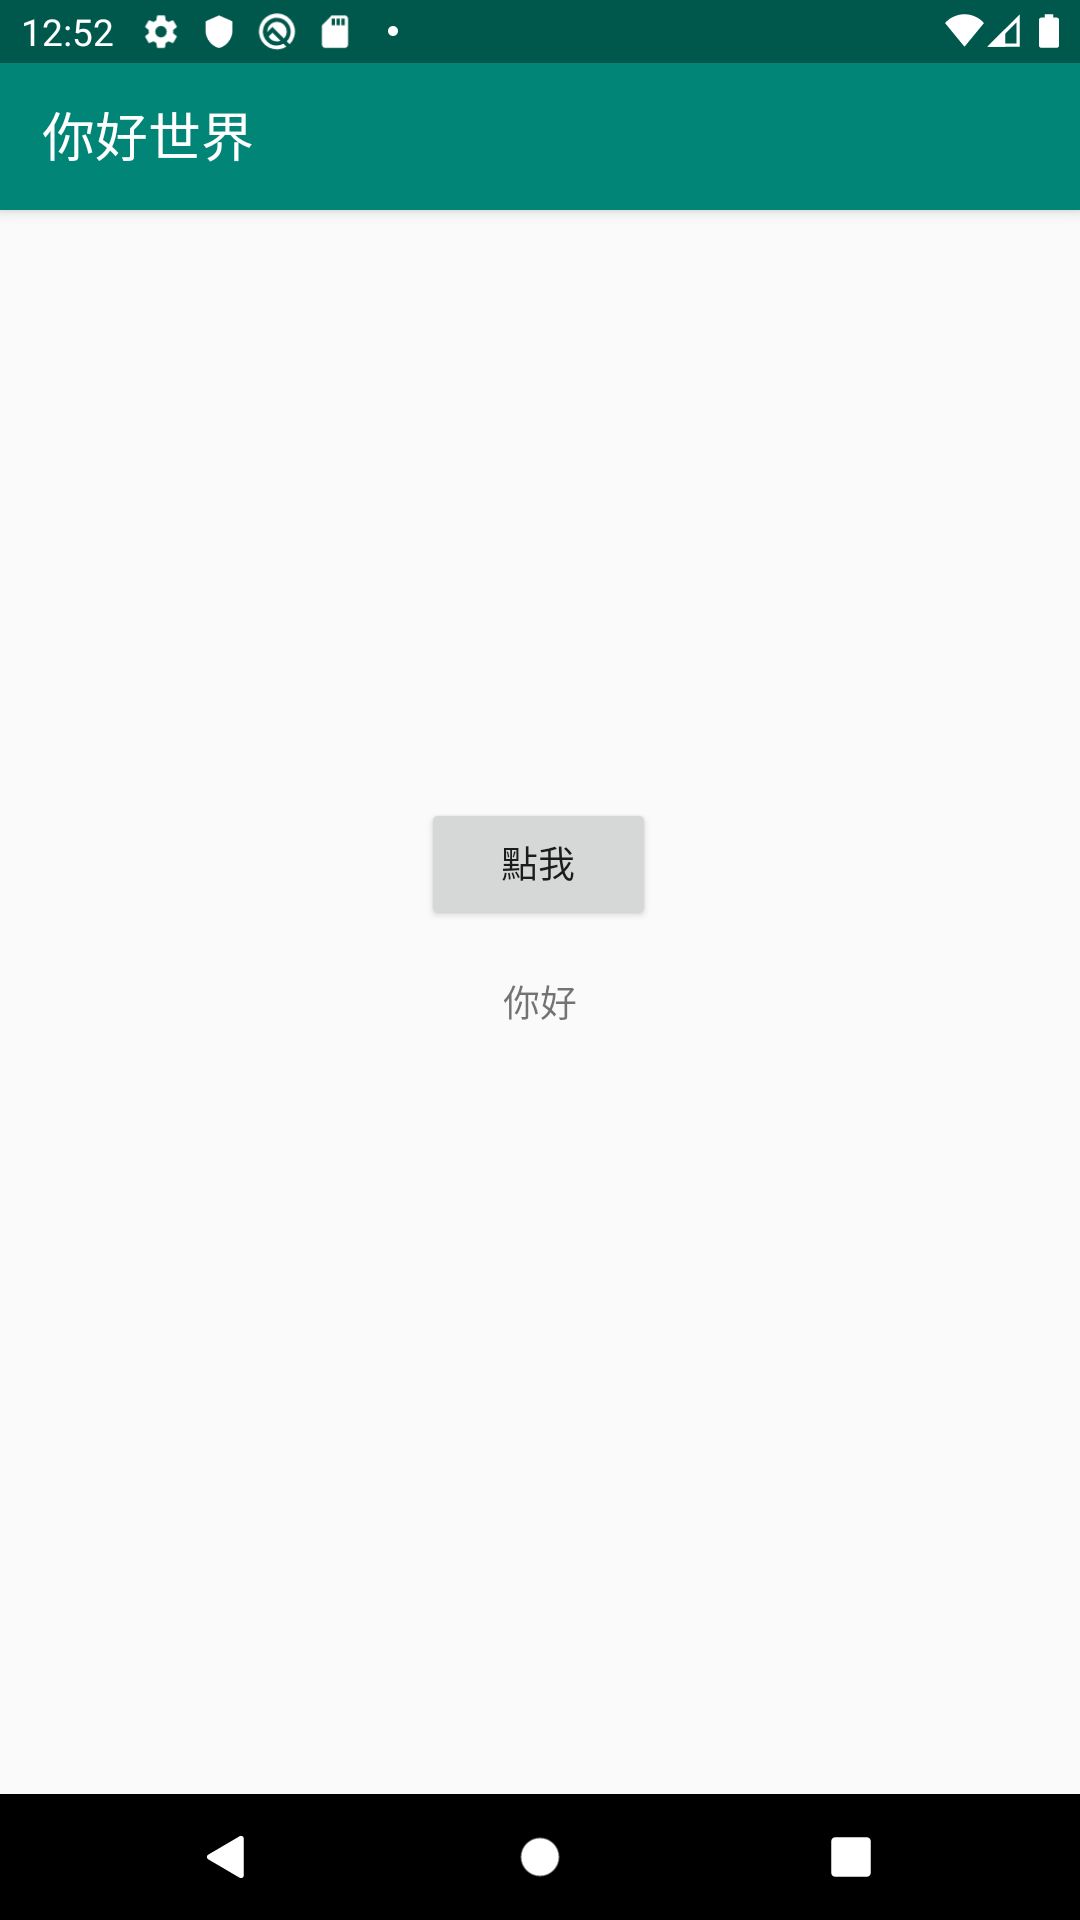
執行後,打開模擬器如下圖

App 的首頁設計好了,下一單元要介紹如何換頁。
相關教學影片

| 中英文術語對照 | |
|---|---|
| 專案 | project |
| 重點整理 |
|---|
| 1. 編排 App 頁面可以使用 Android Studio 的設計工具或是直接編輯 XML 檔案。 |
| 2. ConstraintLayout 是現在 Android Studio 預設的版面編排,可以讓 App 元件自動依手機螢幕尺寸縮放。 |
| 3. 螢幕尺寸的通用單位為 dp ,字型通常會用 sp 設定。 |
| 問題與討論 |
|---|
| 1. 為什麼要用 <LinearLayout> ? |
| 2. 兩種單位 dp 及 sp 有何不同 ? |
| 練習 |
|---|
1. 承接上一單元的 HelloAndroidDemo 專案,建立如下首頁
 |
2. 承接上一單元的 GuessAndroidDemo 專案,建立如下首頁
 |